If you want more cardio without pounding your joints, a weighted hula hoop is a fun way in. It’s rhythmic, low impact, and sneaks in core strength and coordination while you’re basically dancing in place. Ten minutes can leave you warm, a little breathless, and proud you actually had fun.
This guide is for beginners who haven’t hooped since recess, anyone easing back into movement, and busy women who need a workout that fits beside the couch. If you’ve got a small space or neighbors below you, you can still make this work.
Quick Comparison
What’s in this Article
- Start hooping at home with real confidence
- What you’ll find in this guide and how we compare hoops
- Helpful tools and materials
- FAQ
- Your quick next steps
- Keep the momentum
Success here looks simple. You’ll learn how to keep the hoop spinning for 30 to 60 seconds, switch directions without panicking, and build to a steady 10 to 15 minutes. Expect a gentle cardio boost, stronger obliques, and better posture. No, you can’t spot-reduce. You can improve your fitness and feel more at home in your body.
We’ll show you how to choose a hoop that matches your height and experience, how to start without bruising up your hips, and a short beginner workout you can do today. Clear steps, plain language, real-life tips.
Do this first: clear a 6 by 6 foot spot, put on high-waisted leggings and a snug top, and set a 60 second timer. That’s your first practice set. The rest is just rhythm and patience.
Start hooping at home with real confidence
The 60 second zero-pressure start
- Stand with one foot slightly forward, knees soft, ribs relaxed.
- Place the hoop against your lower back, parallel to the floor.
- Give it a firm, flat push around your waist.
- Drive your hips gently front to back or side to side. Pick one, not both.
- Keep the hoop level. If it tilts, reset and try again.
- When it drops, smile, pick it up, and start the opposite direction.
Space, clothes, and flooring that make it easier
- Space: aim for arm’s length all around you and a little overhead clearance.
- Clothes: smooth fabrics reduce friction. A fitted top and leggings help. Avoid zippers and bulky seams.
- Footwear: bare feet or cross-trainers. Socks can be slippery on hard floors.
- Floor: carpet adds drag and can help beginners. Wood or tile is smoother and faster.
Safety checks and when to go slower
- New to exercise, pregnant, postpartum, recent back or pelvic floor issues, hernia, or osteoporosis risk. Get cleared by your clinician first.
- Start light and short. Two to three sets of 60 to 90 seconds per side.
- A little tenderness on the hips is common early on. Sharp pain, tingling, or back pain is your cue to stop and reassess form or lighten the hoop.
What you’ll find in this guide and how we compare hoops
Fit cues we rely on
We look at hoop diameter and weight first. Diameter determines how slowly the hoop moves. For most beginners, a larger diameter that reaches roughly between your hip bone and belly button is easier to learn on. Weight affects feel and effort. Lighter spins faster and is gentler on bones and joints. Heavier feels “sticky” and can bruise if you’re not ready for it.
Build quality and comfort checks
Materials matter. We consider tubing type, padding density, and surface grip. Strong, consistent segment locks keep the hoop round and quiet. Too soft padding can compress and feel lumpy. Too hard can sting. Grip texture helps the hoop track without pinching skin.
Practical extras you’ll actually notice
We look at collapse and travel options, noise level for apartments, ease of assembly, and storage footprint. We also note maintenance needs and any care tips that help your hoop last.
You’ll see quick comparisons later to scan sizes, weights, materials, and standout features at a glance. The goal is simple. Match a hoop to your body and space so you can start today, keep it up tomorrow, and feel stronger next month.
Helpful tools and materials
You can learn everything in this guide with any large, light hoop you already have. These picks simply make the start smoother, the fit comfier, and progression easier if you want it.
Everyday starter hoop

Comfy 2 lb padded hoop—adjustable size and packable—plus a speed rope and poster to keep cardio fun while you torch calories and strengthen your core.
$19.99 on Amazon
Price and availability are accurate as of 03/10/2026 07:56 pm GMT and are subject to change.
This padded 2 lb hoop is a gentle way to learn stance, timing, and the front-to-back hip drive we cue in the First spin checklist. The diameter and padding help the hoop stay level longer, so you can focus on clean starts and switching directions. If you want a ready-to-go kit with storage handled, the bag is handy for closets or car trunks. Curious to try it for your first week? Here’s the listing: Ryno Tuff 2 lb Padded Weighted Hula Hoop (8‑Section) with Bag & Jump Rope.
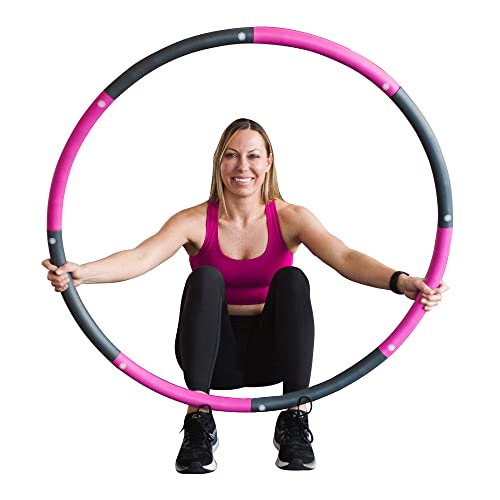
Heavy core challenge

Already hoop-savvy and 130lb+? This 5.3 lb wavy-weighted hoop boosts core burn, stays up easier, cushions your waist, and snaps apart for quick storage. Learn more.
$41.84 on Amazon
Price and availability are accurate as of 03/10/2026 07:57 pm GMT and are subject to change.
Already comfortable spinning a lighter hoop and want more strength stimulus in less time? This 5.3 lb, ridged design turns 20 to 40 second bouts into real core work. Use it for the shorter work intervals in our 12 minute workout, layer a thicker top or leggings, and cap total time low at first. If you’re building up from 2 lb and ready to level up, check details here: ACU Hoop 6L 5.3 lb Weighted Hula Hoop with Ridges (Rainbow).
Technique-friendly trainer
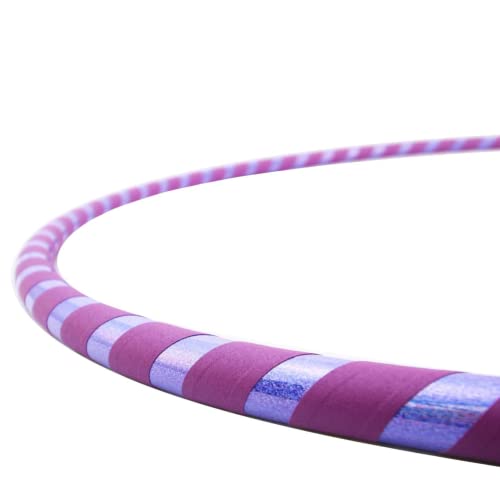
Turn workouts into play. This 1.3 lb detachable hoop targets core and back, supports posture, and packs small for travel. Pick a color and give it a spin.
$49.95 on Amazon
Price and availability are accurate as of 03/10/2026 07:57 pm GMT and are subject to change.
If you want a hoop that makes learning feel natural, this beginner model shines. The smooth surface slides against fabric without tugging, which helps you keep the hoop parallel and find that easy rhythm we describe in the guide. It’s a solid pick for practicing clean starts, switching directions, and adding a few dancey steps once you’re confident. See sizing and color options here: The Spinsterz Beginner Hoop – Weighted, Adjustable Hula Hoop (Made in USA, Iris).
Adjustable progression tool
Make cardio fun: this 3 lb weighted hoop can burn serious calories, tone core, and feels comfy with 5mm foam. Snap-to-size, travel-ready. Want the details? Check it out.
$42.89 on Amazon
Price and availability are accurate as of 03/10/2026 07:58 pm GMT and are subject to change.
When your 1 to 2 lb hoop starts to feel easy, this adjustable 3 lb option helps you progress without jumping straight to a very heavy model. The modular design lets you fine-tune diameter so the hoop sits where you want it on your waist, which supports cleaner technique during the 1 minute intervals in our workout. Keep sets short, switch directions, and build a minute at a time.
FAQ
Setup
Q: What size and weight hoop should I start with?
A: Most adults do well with a 38 to 42 inch diameter and 1 to 2 pounds. If you are taller or brand new, go bigger and lighter so the hoop moves slower. Avoid anything over 3 pounds until your technique is solid.
Troubleshooting
Q: My hoop keeps dropping. What am I doing wrong?
A: Start the hoop level at your natural waist, give it a firm, flat spin, and drive your hips front to back or side to side instead of big circles. Keep your ribs down, shoulders relaxed, and eyes forward. Turn your body in the direction the hoop spins to buy time. Switch directions every minute to keep it even.
Safety and pacing
Q: It hurts or I’m bruising. Is that normal?
A: Some tenderness is common in the first week. Use a lighter hoop, limit sessions to 5 to 10 minutes, and wear snug layers over your midsection to reduce friction. Keep the hoop at your waist, not on your hip bones, and move slightly so it does not hit the same spot every pass. If pain is sharp or lingers, stop and reassess your form or check in with a pro.
Q: How often should I hoop to see results?
A: Aim for 10 to 15 minutes, 3 to 5 days per week. Start with 60 second spins and 30 to 60 seconds rest, repeat 5 to 8 rounds. Add 1 to 2 minutes each week, alternate directions, and pair hooping with walks or strength work for balanced fitness.
You’ve got the basics. You know why hooping works, how to pick a hoop that fits your body, and what a beginner-friendly session looks like. The rest is practice and patience.
Start light, keep sessions short, and let yourself learn without judgment. It’s normal for the hoop to drop a lot in the first week. Every restart counts as a rep. If you can move your hips front to back and breathe, you can do this.
Aim for simple consistency. Two to three short bouts of hooping spread through your day can feel easier than one long block. Layer up if your skin feels tender, switch directions each set, and celebrate the small wins.
Your quick next steps
Pick your hoop with this 30‑second recap
- If you want easier learning and a slower spin, choose a weighted fitness hoop. If you want tricks and dance flow, a standard lighter hoop is better.
- Diameter guidelines: petite bodies often do well with 36 to 38 inches, most folks thrive around 38 to 42 inches, and taller bodies may like 42 to 46 inches. Bigger diameter spins slower and is easier to control.
- Weight guidelines: beginners usually start around 1 to 2 pounds. Go lighter if you’re sensitive to bruising or brand new. Go heavier only after your form is solid.
- Materials: foam‑padded plastic feels kinder on skin. Bare plastic is more durable and faster. If you want less noise and more comfort, pick padding.
- Collapsible or segment hoops are great for small spaces and travel. Fixed hoops feel smoother if you have the storage room.
- If you have back pain, a recent abdominal surgery, pelvic floor concerns, or a hernia, start lighter, keep sessions short, and check with a clinician first.
Your first‑week action plan
- Day 1 to 2: 3 sets of 60 seconds in your stronger direction. Rest between. Practice stance and keeping the hoop level.
- Day 3: Add 2 sets in your non‑dominant direction. Keep sessions under 10 minutes total.
- Day 4: Try the 12‑minute sequence from this guide. Keep breath steady and ribs relaxed.
- Day 5: Focus day. Film 20 seconds to check level hoop, hip drive, and posture.
- Day 6: Add a simple foot switch or gentle walk while hooping. Short sets only.
- Day 7: Recovery walk and light mobility. Clean and hang your hoop. Plan next week.
Safety signals and caveats
- Mild tenderness on hips is common early on. Layer leggings and a fitted top to reduce friction. If you see deep bruising, drop to a lighter hoop and shorter sets.
- Sharp back pain, pelvic pressure, or dizziness are stop signs. Rest, reassess form, and ask a pro if it persists.
- Postpartum or with diastasis concerns, keep weight light, focus on tall posture and easy breath, and avoid long holds of your breath.
Keep the momentum
Fast fixes when the hoop keeps dropping
- Start the hoop at your natural waist, parallel to the floor. Give it a firm, flat push to your belly button.
- Drive hips front to back, not in big circles. Think “forward, back” like a gentle pulse.
- Keep your chest relaxed and your gaze up. If shoulders hike up, drop them and reset.
- Bend knees softly. Micro bend helps absorb force and steadies rhythm.
- Switch directions every set. Your weaker side catches up faster if you train it early.
- If it still falls, try a larger diameter or slightly heavier hoop so it spins slower.
Where to go next on ActiveBella
- Activities: more at‑home cardio ideas that are easy on joints and time.
- Fitness Gear: our curated picks for small‑space equipment that actually gets used.
- Beginner workout guides: short routines you can stack with hooping.
- Recovery: simple mobility flows and sore‑spot care for hips, low back, and core.
Bookmark and share
- Save this guide so you can revisit form cues and the 12‑minute workout.
- If you search later, use terms like weighted hula hoop, hula hoop for fitness, best hula hoop 2026, and how to hula hoop to find more training ideas and gear picks.
- Ready to roll today? Do two 60‑second intervals right now, switch directions, and call it a win. Add one minute tomorrow.


Leave a Comment