Ever watch someone crush squats and wonder how their glutes look so lifted and round? The secret is not magic. It is a smart plan that centers on squats, adds the right supporting moves, and respects recovery.
This 4-week routine is built for beginners and intermediates who want fuller, rounder glutes with better shape and strength. We keep the focus on squat patterns, then layer in simple accessories that light up your side glutes and under‑glute shelf.
Quick Comparison
What’s in this Article
- What this guide helps you do
- Equipment and simple prep
- Tools that make this easier
- FAQ
- Keep score and see changes
- After 4 weeks, choose your path
You can expect noticeable changes in about 4 to 8 weeks with consistent training, enough protein, and decent sleep. That might look like jeans fitting better, stairs feeling easier, and a perkier side view. Busy week? Do what you can. Two lower‑body sessions still count.
We’ll coach you on stance, depth, and tempo so each rep actually targets your glutes. You’ll get options for lighter days, heavier days, and at‑home setups. No perfection pressure. Just steady, doable progress.
Before we dive in, quick real talk. If you’ve got cranky knees or hips, we’ll show you box squat and stance tweaks that feel safer. If you are pregnant or newly postpartum, get a green light from your provider and move at a gentler pace.
What this guide helps you do
Build rounder glutes with squat‑centered training
- Use squats as your main driver, then add moves that hit glute max and glute med so you get shape from every angle.
- Train 2 to 3 lower‑body days per week with at least 48 hours between hard sessions.
- Work in the sweet spot for muscle growth: moderate to heavy loads, controlled tempo, and enough sets to feel a clear burn.
Nail form that actually targets your glutes
- Stance: slightly wider than hips for most, toes turned out a little, knees tracking over middle toes.
- Depth: aim for thighs at least parallel if your hips and ankles allow. Stop where you can keep a neutral spine and solid knee tracking.
- Tempo: lower in 2 to 3 seconds, slight pause, then drive up with power while squeezing glutes.
Measure progress without stress
- Use 3 to 6 simple checks:
- Rep quality stays clean as weight increases.
- Depth is consistent across sets.
- You feel the burn in glutes, not knees or low back.
- Rate of perceived effort lands around 7 to 9 on your last working set.
- Next‑day soreness lives in glutes and upper hamstrings, not joints.
- You add 2.5 to 5 pounds or 1 to 2 reps most weeks.
- Limitation check: if pain shows up in a joint, reduce load, shorten range, or switch to a box squat. If your schedule is tight, do 2 sessions and walk more on off days.
Equipment and simple prep
Minimal gear that works
- One of these: barbell with plates, a pair of dumbbells, or a kettlebell.
- Mini loop or fabric hip band for warm‑up and lateral work.
- A bench or sturdy box for Bulgarian split squats and box squats.
- Optional but helpful: a hip thrust setup or a soft pad for your hips.
Quick warm‑up that wakes up your glutes
- 5 minutes light cardio: brisk walk, bike, or jump rope.
- Dynamic moves, 30 to 45 seconds each:
- Leg swings front to back and side to side
- Bodyweight squats with a 2‑second pause at the bottom
- Hip hinges to feel hamstrings load
- Banded activation, 1 to 2 rounds:
- Clamshells x 12 to 15 per side
- Monster walks x 10 steps forward and 10 back
- Banded lateral walks x 10 to 15 steps each way
Do this first, today
- Set a box or chair behind you. Do 8 slow bodyweight box squats with a 3‑second lower, light tap, and stand up through your heels.
- Notice three things: knees track over toes, you feel glutes and hamstrings, and you keep ribs stacked over hips. If that feels good, you’re ready for Week 1.
Tools that make this easier
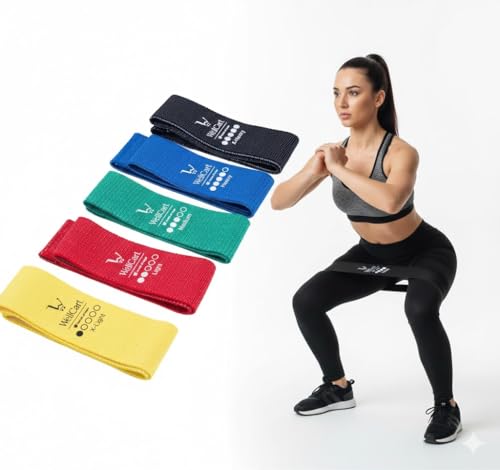
Soft, no-slip fabric/latex bands that stay put. Five resistance levels for warm-ups to burners. Durable, travel-ready, and versatile for glutes, hips, rehab & more. Learn more
$17.00 on Amazon
Price and availability are accurate as of 03/13/2026 01:03 am GMT and are subject to change.
A sturdy fabric hip band is our go-to for warm-ups and finishers. It helps you feel your glutes sooner, keeps knees tracking during squats, and adds easy resistance to clams, monster walks, and bodyweight squats. Great for home or busy gyms when racks are full. If you’re new, start with lighter tension and check fit details here Wellcart Fabric Hip Bands 5-Pack – Non-Slip, X-Light to X-Heavy for Glute and Leg Workouts.

Soft, non-slip fabric bands that won’t pinch bare skin. 3 levels, carry bag, plus guides and videos. Tone glutes and legs anywhere—explore your best fit.
$7.16 on Amazon
Price and availability are accurate as of 03/13/2026 01:05 am GMT and are subject to change.
Adjustable ankle straps make cable kickbacks and abductions comfy and secure, so you can add targeted glute work without stressing your low back. They’re a simple add-on after squats for that extra burn. Look for padded cuffs and solid D-rings if your gym has a cable stack. You can see sizing and attachment options here 3-Pack Fabric Booty Bands with Workout Guide for Glutes, Hips & Legs.

Upgrade your glute days: angled hip-thrust bench that improves form and range, supports up to 800 lb, stays put, and packs small. Bands + anchors included.
$129.99 on Amazon
Price and availability are accurate as of 03/13/2026 01:05 am GMT and are subject to change.
Squat-proof shorts or leggings that stay put let you focus on depth and control, not tugging your waistband. We like a high, supportive rise and opaque fabric for Bulgarians, hip thrusts, and deep squats. If you’re between sizes or prefer more hold, consider going with the compressive option. Quick fit notes are here PAPABABE Angled Hip Thrust Bench with Anti-Slip Tread.
FAQ
Setup
- How deep should I squat for better glute engagement?
Aim for at least parallel thighs. Go a little below if your hips and ankles feel good, while keeping a neutral spine. Use a slightly wider stance with toes turned out a touch, drive through midfoot and heel, and keep knees tracking over toes.
- How do I choose my starting weight?
Pick a load you can lift with about 2 reps in reserve. For goblet squats, many beginners start around 15 to 35 pounds. With a barbell, start with the empty bar and add small plates until the last 2 reps feel challenging but clean. In Week 1, stay lighter and nail form.
Progression and scheduling
- Is 2 or 3 lower body days per week better?
Both work. If you’re newer or busy, do 2 focused days. If you recover well, 3 can help volume. Keep at least 48 hours between heavy squat sessions and adjust if you feel beat up.
Troubleshooting and safety
- My knees cave in on squats. What should I do?
Lower the weight, slow the descent, and think “spread the floor” with your feet. Warm up with banded clams and lateral walks, then squat to a box to groove depth. Keep knees tracking over toes and stop if pain shows up.
If you take anything from this guide, let it be this. Glute shape responds best to smart, consistent squatting paired with a little hinge, thrust, and single‑leg work. Two or three lower body days each week, steady form, and small weekly nudges in load or reps will do more for your butt than any random “burnout” circuit.
Over the next 4 to 8 weeks, expect subtle shape changes first, then stronger lifts and steadier stairs. Some weeks will flow. Some will be messy. That still counts. When in doubt, slow the lower, keep your knees tracking, and drive through your heels. Food and sleep make a big difference here. Protein at each meal and a solid 7 to 9 hours help your body build, not just burn.
If your schedule cracks, keep one anchor move. Even a single focused squat session in a busy week maintains momentum. Show up, do the work you can, and leave a rep in the tank. We’re playing the long game.
Keep score and see changes
What to log each workout
- Exercise, sets, reps, and the heaviest weight used.
- How hard the top set felt on a 1 to 10 scale. Aim for about a 7 to 9 on your last set for main lifts.
- Tempo notes like “2‑1‑2” or “3‑1‑1” and any pauses you used.
- Rest times between sets.
- One quick cue that helped you feel your glutes work, like “knees out” or “push the floor.”
Weekly and monthly checks
- Tape measure: measure around the fullest part of your glutes and your waist at the navel. Same time of day, same posture.
- Progress photos: front, side, and back in the same outfit, same lighting. Once every 2 to 4 weeks is plenty.
- Performance markers: 5×5 back squat weight, 10‑rep goblet squat weight, single‑leg RDL balance on each side, 30‑second hip thrust hold quality.
- Recovery notes: sleep hours, soreness that lingers past 48 hours, cycle phase if that affects your lifts.
Non‑scale wins to notice
- Stairs and hills feel easier.
- More stable knees on lunges and split squats.
- Strong lockout at the top of squats and hip thrusts.
- Clothes glide over your hips instead of catching.
- You can feel your glutes fire first, not just quads and low back.
Quick action plan for this week
- Book two training days that are at least 48 hours apart.
- Do the same warm‑up each time so you can feel progress.
- Pick starting loads that let you keep 1 to 2 clean reps in reserve.
- Add weight in the smallest jumps available next session or add 1 to 2 reps.
- Finish with one mind‑muscle set where you slow the lower and hold the squeeze.
After 4 weeks, choose your path
Deload if this sounds like you
- You feel heavy or achy before you even warm up.
- Your last sets are getting sloppier even when you try to focus.
- Your sleep or stress has been off and you’re dragging.
What to do: cut total sets by about a third next week, keep the same weights or slightly lighter, and tighten up your technique. Focus on crisp reps, pauses, and smooth tempo. You will come back stronger.
Push if this sounds like you
- You’re hitting your reps with room to spare.
- Your form and depth feel dialed in.
- You’re sleeping well and feel eager to train.
What to do: keep warm‑up sets the same, then take one heavier top set on your main squat at a true hard 8 or 9 effort, followed by 2 back‑off sets at 5 to 10 percent less weight. Keep accessories in the 8 to 15 rep range with control.
Where to go next
- Power focus: keep 5×5 squats, add box jumps or kettlebell swings on your lighter day.
- Volume focus: run 3 to 4 sets of 8 to 12 on squats and thrusts, and 12 to 20 on accessories for another 4 weeks.
- Unilateral focus: swap one squat day for Bulgarian split squats and single‑leg RDLs to even out sides.
Edge cases to respect:
- Knee cranky on deep squats. Use a box squat to a comfortable depth, or elevate heels on small plates to keep shins more upright, and strengthen quads with light tempo work.
- Hip pinch at the bottom. Widen or narrow your stance, turn toes out slightly, and stop just before the pinch. If it sticks around, check in with a coach or clinician.
- Postpartum or pelvic floor symptoms like heaviness or leaking. Keep breathing matched to the effort, exhale on the way up, and consider a pelvic floor PT to tailor your plan.
If you want extra support and comfort while you lift, our guides can help you find pieces that stay put and feel good. Check out Best Fabric Hip & Booty Bands for activation and home workouts, Best Women’s Fitness Shorts & Short Leggings for squat‑proof bottoms, and Best Adjustable Ankle Straps if you add cable kickbacks on accessory days. Our leggings reviews are there when you want a pair that actually passes the squat test.
Bottom line. Keep your squat as the anchor, feed your body, sleep, and make small, steady progress. Track what matters, choose deload or push based on how you actually feel, and give yourself credit for showing up. Your glutes will follow.


Leave a Comment